Introduction
Allen-Bradley PanelView Plus (2711P-T10C4D1) is a medium price human – machine interface. The most versatile communication option it offers is Ethernet communication. Programmer should put PanelView Plus in a static IP address to simplify maintenance work.
Setup Static IP Address
- Access PanelView configuration screen. A new PanelView Plus should start up to its configuration screen as shown below. However, if it already has an application and does not go to configuration screen, then you should cycle power to the panelview. Watch lower left hand corner for a white square while it starts up. If you push the white square, it forces the panelview to go to configuration screen.
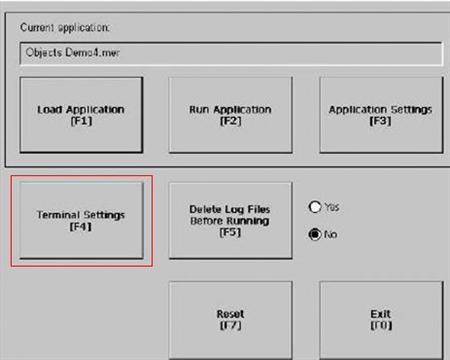
PanelView Plus Start Up and Configuration Screen - Select Terminal Settings to set IP address. Press Terminal Settings button on the picture above.
- Select Networks and communications as shown in the picture below.
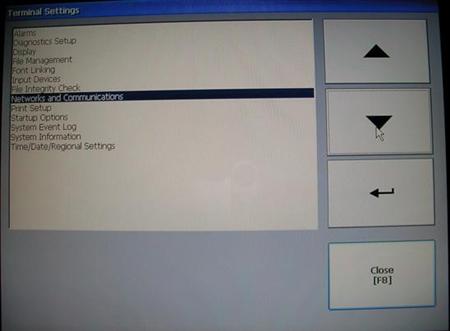
Select Networks and Communication - Select Network connections

Select Network Connections - Select Built In Ethernet Controller
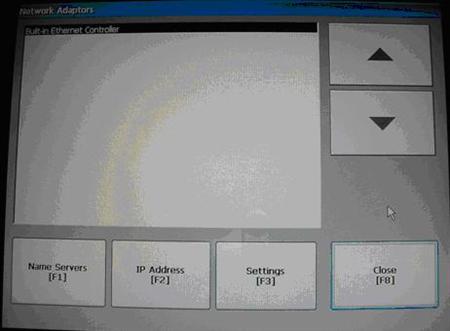
Select Built-in Ethernet Controller - Enter network information. Disable DHCP first. Then you can enter IP Address, subnet mask and gateway by press button with corresponding label. A touch keypad shows up for you to enter information if one of the buttons is pressed. If you are not sure about any required information, check with your network administrator.
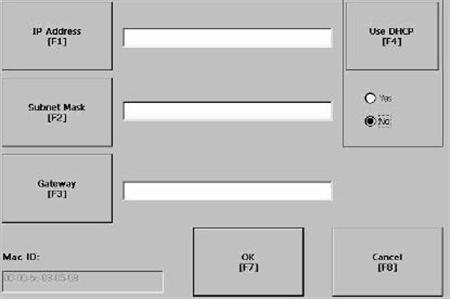
Enter IP Address Mask and Gateway
After you enter a static IP address and reboot the touch screen, you can download application to it through FactoryTalk View’s ME transfer tool. Or you can copy exiting application from your Compact Flash card to the PanelView.